"Crafting Timeless Designs, One Stitch at a Time."

"Crafting Timeless Designs, One Stitch at a Time."
Showing posts with label The Designer’s Needle. Show all posts

Tuesday, May 27, 2025

How to Sew a 3-Tier Tiered Skirt With Elastic Waist (Custom Fullness Options)


Three-tiered beige skirt with an elastic waistband displayed on a mannequin, featuring soft gathers and a flowing silhouette ideal for DIY sewing projects.


Easy Instructions To Sew A Beautiful 3-Tiered Skirt Without A Sewing Pattern

Tiered skirts are timeless. Flowing, flattering, and full of charm, they’re a must-have for every handmade wardrobe—and best of all, they don’t require a commercial pattern.

In this tutorial, I’ll show you how to sew a custom three-tiered skirt with an elastic waistband that fits beautifully and flatters every body shape. Whether you want a dramatic, complete look or a softer, casual drape, the choice is yours—and it all begins with your measurements for a personal fit.

πŸ“₯ Free downloadable PDF tutorial included below!

✂️ Why You’ll Love This Skirt

No pattern needed: Just your waist and desired length

Custom fit: Works for all sizes—small to plus.

Choose your fullness: Make it dramatic or modest.

Comfortable elastic waist: Easy to wear and pair with a belt.

Great for beginners: Simple straight seams and gathering.


πŸͺ‘ What Makes This Tiered Skirt Unique?

This skirt has three gathered tiers, each wider than the last. It moves with you, feels lightweight, and can be dressed up or down.

You’ll also find two fullness options in the PDF:

Full & Flowing: Each tier doubles in width from the previous tier

🎯 Modest Drape: Each tier increases by 1.5x instead of 2x

Both versions use the same construction steps, so you can choose the fullness that best suits your style and fabric choice.


πŸ“ Materials You'll Need

3 to 5 yards of lightweight fabric (cotton lawn, rayon, voile, gauze)

1" or 1½" elastic (your waist measurement)

Thread, pins, scissors, safety pin

Measuring tape, iron, and sewing machine

This skirt is ideal for soft, drapey fabrics that gather well without becoming bulky.


πŸ“₯ Get Your Free PDF Tutorial

I’ve created a beautifully formatted PDF that includes:

Step-by-step instructions

Two fullness layout options (1.5x and 2x)

Custom measuring and tier drafting guide

Finishing tips for waistbands and hems

Printable on standard 8.5" × 11" paper


πŸ’‘ Style Tips

Pair with a tank top or tucked-in tee and belt

Add lace, trim, or contrast fabric between tiers.

Make a matching headband or scarf from fabric scraps.

Use vintage floral fabric for a boho or cottage core vibe.

πŸ’¬This three-tiered skirt is more than just a DIY fashion project—it’s an opportunity to make something beautiful with your own two hands, tailored precisely to you. Whether sewing for yourself or making gifts, the freedom to adjust fullness and fit gives you complete creative control.

πŸ’Œ If you enjoyed this tutorial, share it with a fellow sewist or pin it to your inspiration board.


✂️ Looking for sewing inspiration or supplies?
Visit my The Needle Market Shop where I offer:

  • πŸ“˜ Easy-to-follow eBooks

  • 🧢 Fabric, yarn, and sewing patterns

  • πŸ‘— Handmade doll clothes

Everything I sell is curated or handmade with care to help you sew more—and spend less.
πŸ“₯ Instant downloads. Affordable shipping. No account needed.


Monday, May 26, 2025

πŸ‘” Sew a Gift He’ll Use: DIY Men’s Boxer Shorts for Father’s Day

Illustrated boxer shorts with text reading “Sew a Gift He’ll Use – DIY Men’s Boxer Shorts for Father’s Day – Free PDF Tutorial”


DIY Men's Boxer Shorts For Dad

Father’s Day is just around the corner, and while store-bought gifts are everywhere, nothing says “I appreciate you” quite like a handmade present. “If you’re looking for a creative handmade gift, this tutorial shows how to sew DIY boxer shorts for Father’s Day, a fun and practical project for men.” 

In this article, I’ll show you how to sew men’s boxer shorts without a commercial pattern using a simple tracing method, basic materials, and a bit of creativity. Whether you’re sewing for your dad, husband, brother, or grandfather, this is a gift he’ll wear and remember.

πŸ’ And yes, you can download the free step-by-step illustrated PDF tutorial at the end of this post.


🧡 Why Handmade Boxer Shorts Make a Great Father’s Day Gift

Personalized Fit: Trace from a pair he already loves

Custom Fabrics: Choose colors and prints that match his personality

Practical & Comfortable: A gift he’ll use—no guesswork

No Commercial Pattern Needed: Perfect for beginners or last-minute sewers

This project has a purpose—budget-friendly, stash-busting, and straight from the heart.


✂️ Supplies You’ll Need

1 to 1¼ yards of cotton, cotton blends, polyester, or flannel

1" or 1.5" waistband elastic

A pair of his existing boxers to trace

Thread, scissors, safety pin, sewing machine, and iron

Optional details:

Add a mock fly front with a decorative button.

Use a rounded hem for a softer, more tailored finish.

Add a contrast band to the boxer shorts leg area. 


πŸ“‹ About the Tutorial

This project is broken down into five simple steps:

Trace an existing pair of boxers.

Cut front and back fabric pieces.

Assemble the boxers and topstitch the fly.

Insert the elastic waistband.

Sew a rounded hem to finish.

Each step is illustrated for clarity, so you can confidently create a custom-fit pair.


πŸ“₯ Free Father’s Day Sewing Gift: Download the PDF

I created a printable step-by-step PDF tutorial just for you. It's perfect for beginners, weekend sewers, or anyone wanting a practical, heartfelt project.


What’s inside:

Illustrated steps for visual learners

Clear instructions for rounded hems and mock fly

A branded closure from The Designer’s Needle

Ready-to-print for your sewing space


πŸŽ‰ Make It Extra Special

Sew more than one pair in different prints.

Add a matching drawstring pouch or laundry bag.

Include a tag or card that says “Handmade with Love.”

πŸ’¬ This Father’s Day, give the gift of handmade comfort. Whether you’re sewing your first project or your fiftieth, these boxers are a meaningful way to show appreciation, with every stitch.

Thank you for visiting The Designer’s Needle, where sewing from the heart is always in style. 

Best wishes for a joyful and creative Father's Day!

✂️ Rhonda

✂️ Looking for sewing inspiration or supplies?
Visit my The Needle Market Shop where I offer:

  • πŸ“˜ Easy-to-follow eBooks

  • 🧢 Fabric, yarn, and sewing patterns

  • πŸ‘— Handmade doll clothes

Everything I sell is curated or handmade with care to help you sew more and spend less.
πŸ“₯ Instant downloads. Affordable shipping. No account needed.


Thursday, May 22, 2025

A Stitch in Time: How Sewing Changed My Life

Close-up of hands hand-stitching soft brown fabric near a window, with a vintage sewing machine in the background. A cream card displays the title “A Stitch in Time: How Sewing Changed My Life.”

Every stitch tells a story of healing, joy, and the quiet beauty of making something by hand.


Thread by thread, I found creativity, comfort, and purpose in every stitch.


Sewing isn’t just a craft—it’s a companion and a skill. For me, it started with a needle and a desire to create. Over the years, sewing has shaped my days, mindset, and life. In this post, I want to share how sewing evolved from just a hobby to become a healing, joyful, and deeply personal experience. In this article, I share how sewing helped me heal emotionally, stay creative, and find peace—my personal journey with needle and thread.


🧡 It Began with Curiosity


I didn’t plan to become a sewist. I started sewing at age 11. My mother started me sewing because she knew I loved clothes. We started with simple sewing patterns, and I graduated to intermediate to advanced sewing patterns as I got older. In high school, I was sewing my clothes and my classmates' clothes and getting paid to sew them. Sewing awakened a creative part of me that had been quietly waiting. And once I began, I couldn’t stop.


The Joy of Making Something From Nothing


Sewing taught me how to build something beautiful with my own two hands. With every project, I felt more confident. A pile of fabric transformed into a garment, and I had done that. It was empowering.


πŸͺ‘ A Quiet Space in a Noisy World


Sewing offered me a sanctuary. The hum of the machine and the feel of fabric under my fingers became my meditation. It soothed my stress and grounded me when life felt overwhelming. It was, and still is, my quiet place.


🎁 Sewing Helped Me Give Back


Whether it’s doll clothes for little ones, handmade aprons for kitchens full of memories, or quilts that wrap people in love, sewing helps me connect. It becomes a way to show care, comfort, and creativity. Every stitch I make for someone else becomes a message: You matter.


πŸ’‘ Lessons Sewing Has Taught Me


Patience: Not everything goes as planned—and that’s okay.

Problem-Solving: Every crooked seam taught me something.

Resilience: You can always sew it again if you rip it out.

Vision: The ability to see beauty where others see scraps.

Skillful: I discovered that if I could sew, I could do anything else, such as mechanical work, woodwork, and home repairs. If I can put clothes together, I can put anything else together. 


Sewing changed my life, not all at once, but stitch by stitch. It became my creative outlet, business, therapy, and joy. If you’ve found peace, purpose, or pleasure in your sewing journey, you already know that sewing isn’t just something we do—it’s something we become, such as being very skilled.


πŸ’¬ Has sewing changed your life, too? I’d love to hear your story in the comments. And be sure to visit my The Needle Market Shop to explore handmade inspiration, fabric bundles, and sewing treasures.


Thursday, May 8, 2025

Make a Sewing Keepsake: Stitching Your Life Into a Memory Quilt


A cozy flat lay of fabric squares, vintage scissors, thread spools, and a pincushion arranged on a patchwork quilt, with a card that reads “Make a Sewing Keepsake: Stitching Your Life Into a Memory Quilt.”

Capture your life in stitches—every fabric square tells a story in this heartfelt memory quilt. 


Transform beloved fabrics into a quilted tribute to the moments that matter most.


Some fabrics hold more than thread and fiber—they have memories. A baby’s first blanket, a favorite old shirt, Grandma’s apron, or fabric scraps from projects past can all be stitched together into a memory quilt. These keepsake quilts are more than cozy covers—they’re emotional time capsules. If you've ever wanted to turn your life’s story into stitches, here’s how to start.


🧡 What is a Memory Quilt?


A memory quilt is a handmade quilt created from fabric items that carry sentimental value. It's often made to commemorate loved ones, mark life events, or preserve your sewing journey. Each piece of fabric holds meaning, making the finished quilt deeply personal and unique.


πŸͺ‘ Materials You Can Use:


Clothing (shirts, dresses, jeans, ties, uniforms)

Baby blankets or bibs

Wedding or prom dresses (yes, really!)

Fabric scraps from past sewing projects

Handkerchiefs, tea towels, or pillowcases (Even embroidered pieces)

Printed fabric photos (use printable fabric sheets!)

Old Clothing from the deceased.


✂️ Designing Your Quilt: Simple Tips


1. Choose a Theme or Mood:

Is it for a child, a memorial, a wedding gift, or your own story? Let that guide your color and block layout.

2. Stabilize Stretchy or Worn Fabrics:

Use lightweight fusible interfacing on T-shirts, knits, or worn fabrics to give them structure.

3. Keep the Layout Simple:

Use large squares or strips to let the fabric designs shine. Add sashing or borders if desired.

4. Add Personal Touches:

Hand-stitch names, dates, or quotes. You can even sew in pockets, buttons, or labels from the original garments.


πŸ’‘ Optional Ideas to Personalize It:


Print family photos on fabric.

Add a quilt label with the story behind it.

Include a piece from every sewing project you’ve made in the past year.

Make a “journal quilt” with one block per month or milestone.


🧢 Why Memory Quilts Matter


Memory quilts provide comfort in more ways than one. They're a way to:

Honor loved ones

Preserve family history

Celebrate your sewing journey

Create a keepsake that lives on


Whether stitched from sorrow, love, joy, or hope, your memory quilt will become more than just a blanket—it becomes a story you can wrap around yourself. Start small, start with meaning, and let the memories guide your hands.

πŸ’¬ Have you ever made a memory quilt or dreamt of it? Share your story in the comments.


Thursday, May 1, 2025

How To Sew For The Seasons

A flat lay of seasonal sewing supplies arranged on a wooden surface, including colorful fabrics, floral pins, scissors, and leaves. A central sign reads, “How to Sew for the Seasons: Fabrics, Projects, and Inspiration Year-Round.”
Let every season spark your creativity with fabrics, colors, and projects that reflect the time of year.


Let nature inspire your needle with seasonal fabric choices, projects, and cozy creativity.


Just like nature, your sewing can reflect the rhythm of the seasons. From breezy cottons in spring to warm wools in winter, seasonal sewing isn’t just practical—it’s inspiring! In this post, I’ll guide you through the best fabrics, projects, and creative prompts for every season of the year. Get ready to plan a whole year of sewing joy!


🌸 Spring: Light, Airy, and Fresh


Fabrics to Try:

Cotton lawn, voile, gingham, linen blends

Project Ideas:

Reversible aprons

Lightweight skirts or tunics

Spring-themed doll clothes

Floral table runners or fabric baskets

Inspiration:

Nature’s awakening—think florals, pastels, soft greens, and bird motifs.


☀️ Summer: Bright, Breezy, and Fun


Fabrics to Try:

Cotton, chambray, terry cloth, light knits

Project Ideas:

Tote bags and beach wraps

Sundresses and tank tops

Picnic quilts

Summer sleepwear for dolls or kids

Inspiration:

Sunshine, bold prints, citrus colors, and retro seaside themes.


🍁 Autumn: Cozy, Earthy, and Warm


Fabrics to Try:

Flannel, corduroy, cotton canvas, denim

Project Ideas:

Fall-themed pillows or table linens

Quilted vests or shawls

Rag dolls in autumn outfits

Trick-or-treat bags

Inspiration:

Falling leaves, plaid, harvest hues, and woodland creatures.


❄️ Winter: Soft, Snug, and Festive


Fabrics to Try:

Fleece, wool felt, thermal knit, velvet

Project Ideas:

Holiday aprons or gift bags

Pajama pants and slipper socks

Ornaments and stockings

Cozy doll coats and accessories

Inspiration:

Snowy whites, berry reds, metallics, and cozy textures.


Sewing with the seasons makes every project feel more meaningful and intentional. Whether you're updating your wardrobe, refreshing your decor, or creating something special for a loved one, let each season’s spirit inspire your stitches.

πŸ’¬ What season do you love sewing for the most? I love Fall. Tell me in the comments—


🌸 Thank you for spending time here today! If you'd like more inspiration, don’t miss the trusted creative resources I've shared in the sidebar and footer — they’re hand-picked to spark new ideas and dreams.


Wednesday, April 30, 2025

How To Do A Sewing Room Makeover on a Budget


A cozy, budget-friendly sewing room with a yellow sewing machine, colorful stacked fabrics on a shelf, wall decor made from embroidery hoops, and neatly organized sewing tools on a pegboard.
Simple upgrades and thrifted charm bring this sewing room to life—proof that creativity matters more than cost.


Creative Ideas to Refresh Your Sewing Space Without Breaking the Bank


You don’t need a big budget to make your sewing room feel new, functional, and inspiring. Whether you have a dedicated space or a cozy corner, small changes can make a huge difference in how you feel while sewing. I recently gave my sewing area a makeover using thrifted finds, repurposed items, and creative DIYs—and now I’m sharing the best ideas with you!


1. Reimagine What You Already Have

Before buying anything, shop your own home!

Turn a vintage mug into a thread catcher.

Use old jars or tins to store buttons or pins.

Repurpose bookshelves or crates for fabric storage.


2. Thrift Store and Dollar Store Treasures

You’d be surprised what you can find at secondhand shops:

Pegboards for tools

Glass jars for bobbins

Picture frames for displaying vintage patterns or making a fabric-covered corkboard

Vintage bowls for holding pins and other sewing essentials


Dollar stores often have:

Drawer organizers

Stackable bins

Cute containers for scraps or tools


3. DIY Decor That Inspires

Create a mini gallery wall with:

Embroidery hoops stretched with favorite fabrics

Handmade signage like “Sew Happy” or “Snip Snip Hooray!”

Framed pattern envelopes or vintage needlebooks

Even a pop of fresh paint or removable wallpaper behind your sewing station can brighten the space dramatically.


4. Go Vertical

If floor space is limited, use your walls:

Install hooks or tension rods for ribbon, scissors, or tools.

Hang baskets or tote bags for fabric or pattern storage.

Use a hanging shoe organizer for notions and small projects.

A bookshelf is excellent for storing fabric and sewing tools.


5. Comfort Is Key

Add a cozy rug, a thrifted chair cushion, or a DIY floor mat. Hang curtains for softness, or string fairy lights for a whimsical feel. Make the space a place you want to spend time in, not just work.


You don’t need to splurge to make your sewing space memorable. With some creativity and effort, your sewing room can become your favorite room in the house. After all, our sewing room is our woman's cave, and we want it perfect!

πŸ’¬ What’s your favorite budget-friendly sewing room idea? Share it in the comments? 

πŸŽ€ Ready for even more creative ideas? Take a peek at the resources waiting for you in the sidebar and at the bottom of this page.


Friday, April 25, 2025

5 Quick Fixes for Common Sewing Frustrations (and How to Avoid Them)

A colorful flat lay of sewing tools including scissors, pins, thread spools, a seam ripper, and a thimble arranged around a paper with the title “5 Quick Fixes for Common Sewing Frustrations.”

                  Essential sewing tools and a reminder that every mistake has a simple solution.


Save time, fabric, and your sanity with these tried-and-true sewing solutions!


Even experienced sewists face the occasional hiccup at the machine. Whether it's tangled thread, uneven hems, or a pattern that won’t cooperate, these little frustrations can interrupt your flow. The good news? Most of them have simple fixes!

Here are five quick solutions to the most common sewing problems, plus tips on how to avoid them.


1. Thread Nests Under the Fabric

The Fix:

Stop sewing immediately. Lift the presser foot, gently cut away the tangled threads, and remove the fabric. Re-thread both your top thread and bobbin, then check that the bobbin is inserted correctly.

Prevention Tip:

When starting a new seam, always hold the top and bobbin threads behind the needle, and remember to thread with the presser foot up.


2. Skipped Stitches

The Fix:

Replace your needle—it may be dull or bent. Also, check that it’s fully inserted and tightened. Use the correct needle type and size for your fabric.

Prevention Tip:

Change your needle every 8-10 hours of sewing. It’s a small habit that can improve stitch quality.


3. Wavy or Stretched Seams on Knits

The Fix:

Reduce the pressure on your presser foot and use a ballpoint needle. If available, switch to a walking foot or use a narrow zigzag stitch to allow stretch.

Prevention Tip:

Stabilize your fabric with tissue paper or stay tape before sewing, and avoid pulling the fabric as you stitch.


4. Fabric Won’t Feed Properly

The Fix:

Check that your feed dogs are up (sometimes they drop for free motion quilting and get forgotten). Clean out lint from under the presser plate and ensure your presser foot pressure is set correctly.

Prevention Tip:

Give your machine a mini clean after every few projects. Dust and thread fluff love to hide!


5. Puckered Seams on Lightweight Fabric

The Fix:

Loosen the tension, use a finer needle (size 70/10), and switch to a smaller stitch length. Pressing with a steam iron can also help flatten puckers.

Prevention Tip:

Test stitch on a fabric scrap first, and consider using a stabilizer or interfacing for ultra-light fabrics.

Sewing doesn’t have to be stressful—just a few simple habits can make all the difference. Keep this list handy for your next project; you’ll breeze through your sewing sessions with fewer interruptions and better results.


πŸ’¬ Let’s Chat:

What’s the most annoying sewing issue you’ve faced? Leave a comment below and share your quick fix! And don’t forget to visit my The Needle Market Shop for sewing supplies, patterns, and inspiration.


How To Sew A Tea Party


A charming tea party setup with floral teapots, a pink quilted teapot cozy, Dresden plate tablecloth, rose-patterned napkins, and tiered treats — perfect inspiration for a handmade sewing blog.
A stitched-together celebration: floral rose teapots, cozy quilt work, and sweet little touches sewn by hand.


From Teapot Cozies to Tiny Treats — Sew Your Way to the Sweetest Party Ever!


There’s something nostalgic and heartwarming about a tea party. Whether gathering with friends, entertaining little ones, or setting the stage for an afternoon of calm and creativity, a handmade tea party is a beautiful way to bring charm into your home, one stitch at a time.

Today, I’m sharing how you can sew your tea party. Every thread can reflect your unique style and warmth, from the table decor to tiny details.


🍰 Choose Your Fabric & Theme


Start with your mood. Are you going for vintage florals, soft pastels, or whimsical gingham? A single teacup pattern can inspire a whole scene. As you observe the image at the top of this article, I chose the "Floral Rose" theme since it is my signature. 


Lovely fabric choices for a tea party:


Soft cottons in florals, polka dots, or stripes


Lace, linen, or muslin for overlays


Upcycled vintage tablecloths or handkerchiefs


Let your imagination guide you — this is your creative retreat.


🧡 Tea Party Projects to Sew


Here are some easy, beautiful sewing projects that will turn your gathering into something truly special:


🌸 1. Reversible Napkins & Placemats


Choose two coordinating fabrics. You can add lace trim or scalloped edges if you like. These small projects add elegance and are quick to complete. You may want to consider Dresden Doilies, which complement a tea party as you sew the napkins and placemats. You can sew them in different sizes to place a tray, teapot, and other tea party essentials on. 


🍡 2. A Quilted Teapot Cozy


A must-have to keep your tea warm and your table cute. Use quilt batting for insulation and choose a fabric that makes you smile. Click here for free teapot cozies to sew or knit.  


πŸŽ€ 3. Fabric Bunting Garland


Use leftover scraps in complementary tones. Pinking shears give a playful edge, or you can stitch and turn for a more finished look. Hang across your tea table or doorway.


πŸͺ‘ 4. Chair Cushions or Slipcovers


If you have the time, matching seat pads or tied fabric covers can elevate your tea setting with comfort and color. Click here for free chair slipcover patterns. 


🧸 5. Doll-Sized Tea Party Accessories


Don’t forget your smallest guests. Create tiny napkins, a doll tablecloth, or even mini aprons for 18-inch dolls — a perfect companion project if you love sewing doll clothes. Click here for a free 18" doll half apron. 


πŸ«– Dress the Part: Aprons & Accessories


Sew a classic half-apron for yourself or your guests. Vintage-inspired patterns with a flounce or pocket detail work beautifully. Add matching headbands or bows for a sweet, finished look. Click here for women's free half-apron sewing patterns. 


🌷 A Moment of Reflection with Tea


There’s beauty in pausing to savor a cup of tea as we prepare, decorate, and stitch.


If you’d like to take a moment with me, I invite you to read my short article,

“The Quiet Wisdom of Tea” on my companion blog, The Blogger’s Attic.


You can also download a free printable version here:

πŸ“„ Download How To Sew A Tea Party Printable PDF


Let’s have a cup of tea together as we think, reminisce, and wonder about the simple joys of life.


🧺 Final Touches & Display Tips


Arrange a basket of rolled-up napkins with ribbon ties. Place fresh flowers in a teacup. Use thrifted China, a tiered tray, and soft music to create a dreamy atmosphere.


Take photos of your setup to capture the moment—or share them on social media. It’s your creation!


πŸ’Œ Thank You for Stitching Along


A tea party doesn't have to be extravagant. You can sew something memorable with a little thread, a dash of imagination, and a cup of tea.


🧡 Stitch the Perfect Apron for Your Tea Party
Looking for a full or half apron to match your tea party vibe? The McCall’s L9416 sewing pattern from 2022 features both styles, perfect for creating a classic, handmade look. Whether you’re baking, hosting, or gifting, this pattern adds charm and function to your sewing lineup.
🧺 Click here to view it in my The Needle Market Shop


☕ If you've hosted your own tea party, I’d love to hear about it. Feel free to share your creations with me!


Until next time,

The Designer Behind the Needle


Wednesday, April 23, 2025

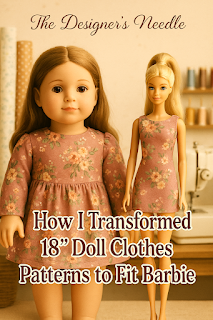
How I Transformed 18" Doll Clothes Patterns to Fit 11 1/2" Barbie

A Barbie doll and an 18-inch doll wearing matching floral dresses stand side by side in a cozy sewing room. The title "How I Transformed 18” Doll Clothes Patterns to Fit Barbie" is written in large text above them, branded for The Designer’s Needle blog.
From big to Barbie—see how I resized 18" doll clothes patterns to create one-of-a-kind Barbie fashions.


How I Put My Creativity To Work for 18-Inch Dolls and 11 1/2-Inch Barbies!


Where there’s a will, there’s a way—that’s always been my motto. One day, while browsing 18-inch doll clothes patterns, I was inspired: Why not transform them to fit Barbie? The basic principles were the same, and I already had the tools—just a printer, creativity, and my love for doll fashion. That’s how I began turning 18-inch doll clothes into one-of-a-kind outfits for 11.5" Barbie dolls, which worked beautifully. In this sewing tutorial, I’ll show you how I transformed 18-inch doll clothes patterns to fit an 11.5" Barbie—no special software needed!


Nearly two decades later, I’m still using this clever shortcut—and now I’m sharing it with you!


The Spark of the Idea


Eighteen years ago, I was sewing clothes for 18-inch dolls like American Girl. One day, I was curious, so I placed a doll clothes pattern on my printer bed and reduced the scale using the printer settings. After printing the pattern at a smaller size, I had my very first Barbie-sized version—and a whole new creative path opened up!


Resizing Tips That Worked for Me


Use your printer’s scale settings: Start with 60%–65 % for 11.5” Barbie proportions.

✂️ Test print a small piece first: Try the bodice front before committing to the complete set.

Adjust small details: Neckline depth, seam allowance, and armhole curves may need refinement.

Choose lighter materials: Lightweight cottons and tiny trims suit Barbie’s scale best.


Mixing and Matching for Style


Instead of just one pattern, I combined favorites: a skirt from one design, a top from another, and sleeves from a third. This mashup method gave me fresh, original Barbie clothes every time—and it was fun!


Selling Original Creations


As I perfected the resizing process, I began listing these outfits on selling platforms. Their handmade charm and creative flair made them stand out—and they sold!


Why This Idea Still Matters Today


Give new life to old or vintage patterns.

Avoid buying new Barbie patterns by reusing what you have.

Stretch your creativity with custom looks.

 Save time by adapting rather than drafting from scratch.


If you love sewing for dolls, try this creative shortcut. Reducing 18-inch doll patterns for Barbie isn’t just clever—it’s a doorway into endless miniature fashion possibilities.


Join the conversation:

Have you tried resizing doll clothes patterns? I’d love to hear about it in the comments. And don’t forget to click here to visit my The Needle Market Shop for more patterns, fabrics, and sewing inspiration.


The Closing Of The Designer's Needle To The Opening Of The Needle Market.

  The Closing Of The Designer's Needle To The Opening Of The Needle Market. I've Moved to a New Online Home: The Needle Market Dear ...